General Handpiece Maintenance
The following guidelines represent a general approach to handpiece maintenance. Always follow the suggested maintenance procedures supplied with the handpiece. Especially during the warranty period, it is important to follow these instructions to the letter to avoid disputed warranty claims.
- Surface Clean The Handpiece. CDC guidelines call for flushing water through the handpiece in the operatory for 30 seconds to remove potential contaminants from the internal water line. In the sterilization area, clean off any bio burden using a brush under running water. Use of a mild detergent is acceptable. Bio burden left on dental instruments may act as a protective shield for microorganisms in the sterilizer. Alcohol should never be used as a cleaning agent as it can dehydrate spores increasing resistance to sterilization. Do not use any chemical solutions for cleaning, foreign substances may have a detrimental effect on the sterilizer or the handpiece, through a harmful reaction during the sterilization cycle.
- Dry Off the Handpiece. This step is very important if the office is using a chemiclave sterilizer. Excess water will allow oxidation to occur in the chamber leading to corrosion.
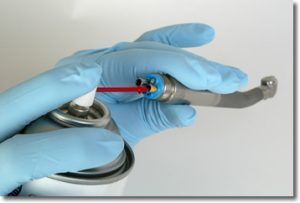
- Lubricate the Handpiece. Use the proper lubricating tip to spray oil into the drive air line. Spray until oil comes out the handpiece head. This ensures that lubricant has penetrated to the bearings. Even if lubricant is delivered incorrectly, oil coming from the head indicates it has reached the bearings.
Note: Using a spray oil has become less popular because of perceived mess and wastage. Many offices are moving to dropper style applicators to oil the handpiece. Use of a dropper makes the next step, running out the excess oil critical, because the droplets will not be delivered to the bearings without being propelled by pressurized air. If you prefer a dropper, apply 2-3 good size drops to the drive air hole and immediately run the handpiece.
- Run the Handpiece to Expel Excess Oil. After lubrication, it is important to run the handpiece to evenly distribute the oil through the bearings, and to expel excess oil to prevent coagulation during autoclaving. Install a bur in the chuck and run the handpiece for twenty seconds. Do not use a bur blank, they are not made to iso specifications and do not run concentrically, possibly damaging the turbine. *Note: some manufacturers specifically state NOT to install a bur prior to operation.
Air flush stations located in the sterilization area are an excellent investment. A flush station eliminates a trip back to the operatory to run the handpiece. These stations are readily available from many sources and only require a connection to an air line. Most stations have a handpiece adapter that operates the handpiece when pressed. Using an air station also prevents oil from being exhausted back into the handpiece tubing where leading to discoloration, and stiffening. After operating, remove the bur. Lever style handpieces must remain in the closed position during sterilization.
- Clean Fiber Optic Surfaces. Alcohol and a cue tip may be used to remove excess oil and debris from all fiber optic surfaces.
- Bag the Handpiece. CDC guidelines recommend bagging instruments and handpieces to maintain sterility. A paper/plastic combination bag is preferred, allowing steam to dissipate through the paper side while contents remain readily identifiable.
- Sterilize. Autoclave the handpiece following manufacturer guidelines. Allow the sterilizer to completely process through the dry cycle.
- Dry the Handpiece. After the cycle, place the bag containing the handpiece paper side up on top of the sterilizer to thoroughly dry. This is a warm area; as the heat from the sterilizer rises, the handpiece will more thoroughly dry. New sterilizer models feature dry/storage compartments outside the chamber. Paper side up allows the moisture from the condensing steam to evaporate easily. Leaving the plastic side up traps condensation in the bag creating a corrosive atmosphere for the handpiece.
Things to Watch Out For
- Using a chemical wipe down on a handpiece before sterilizing – Not only is this redundant, but it may multiply harmful reactions when subjected to heat
- Using an ultrasonic cleaner or solution – Never immerse a handpiece in any fluids other than a cleaning solution offered by the handpiece manufacturer
- Lubricating in the wrong hole – The drive air line leads directly to the turbine, other orifices such as exhaust, water, etc. do not. If you are using a liquid oil applicator on a swivel type handpiece, it is critical that you deliver oil to the correct internal opening
- Incorrect lube applicator – Make sure the spray tip fits the handpiece quick disconnect correctly. Some models depend on a pressurized fit to flush debris out of the handpiece.
- Not applying enough lubricant – Staff is sometimes admonished not to overspray oil into the handpiece to reduce excess residue, however you must ensure that oil is getting to the bearings by seeing oil in the head
- Not running the handpiece prior to autoclaving – Failure to operate the handpiece following lubrication will result in “gumming up” the turbine as excess oil gets baked into the bearings. An undesirable clinical effect is expelling oil into the operating field after the not properly running out any excess
- Not cleaning the fiber optic bundles – Failure to keep the fiber optic bundle surfaces clean will lead to a build up of oil and debris affecting the ability to transmit light
- Leaving the bur in the chuck during autoclaving – While a bur is held in an autochuck the spring is compressed. Subjecting any spring to heat and corrosion under tension will weaken it and shorten the life. Leaving a bur in a manual chuck leads to debris building up in and on the chuck leading to increased difficulty of operation.
- Leaving levers open during autoclaving – When a lever autochuck is actuated, about 8lbs. of force is exerted through the front o ring of the turbine. During normal operation this force is momentary as a bur is changed. Leaving the chuck open during the autoclave cycle means compressing the o ring while subjecting it to heat for thirty minutes, dramatically accelerating failure.
- Failure to maintain autoclaves – If your autoclave is not properly cleaned, build up can occur that contaminates the entire system including your handpieces.
Many manufacturers offer a fully automatic clean and lube station to take staff time and guesswork out of the maintenance process. Most units allow for one touch operation, applying a cleaner and lubricant, before running the handpiece. Although costly, these maintenance centers reduce staff time associated with handpiece maintenance. Some manufacturers extend handpiece warranties if their automatic station is used.
Low Speed Motors & Attachments
- Motors. Motors, especially vane rotors, do not require that much oil. Dental motors and attachments require higher viscosity oil than a high speed spray. One or two drops of oil in the drive air line are all that is necessary. Run the motor to distribute the oil. Also apply some oil as a preventative measure to forward/reverse valves, shift rings, and sheath attachment points. Wipe away excess oil with a paper towel.
- Sheaths and Attachments. Most straight sheaths do not require lubrication. It is recommended to do an external cleaning with a brush under running water prior to bagging the nose cone for sterilization.
- Latch Angles. It is very important to take latch angles apart for proper lubrication. At least once a day unscrew the head from the sheath and remove the transmission gear for cleaning and oiling. Suggest first thing in the morning as part of the opening routine. A Star latch angle requires the knuckle in the middle to be unscrewed in order to remove the transmission gear. Apply a drop of oil under each gear on the transmission gear as well as into the center hole. Apply several drops of oil to the exposed cartridge while the transmission gear is removed.